Create rules and import QuickBooks bank rules
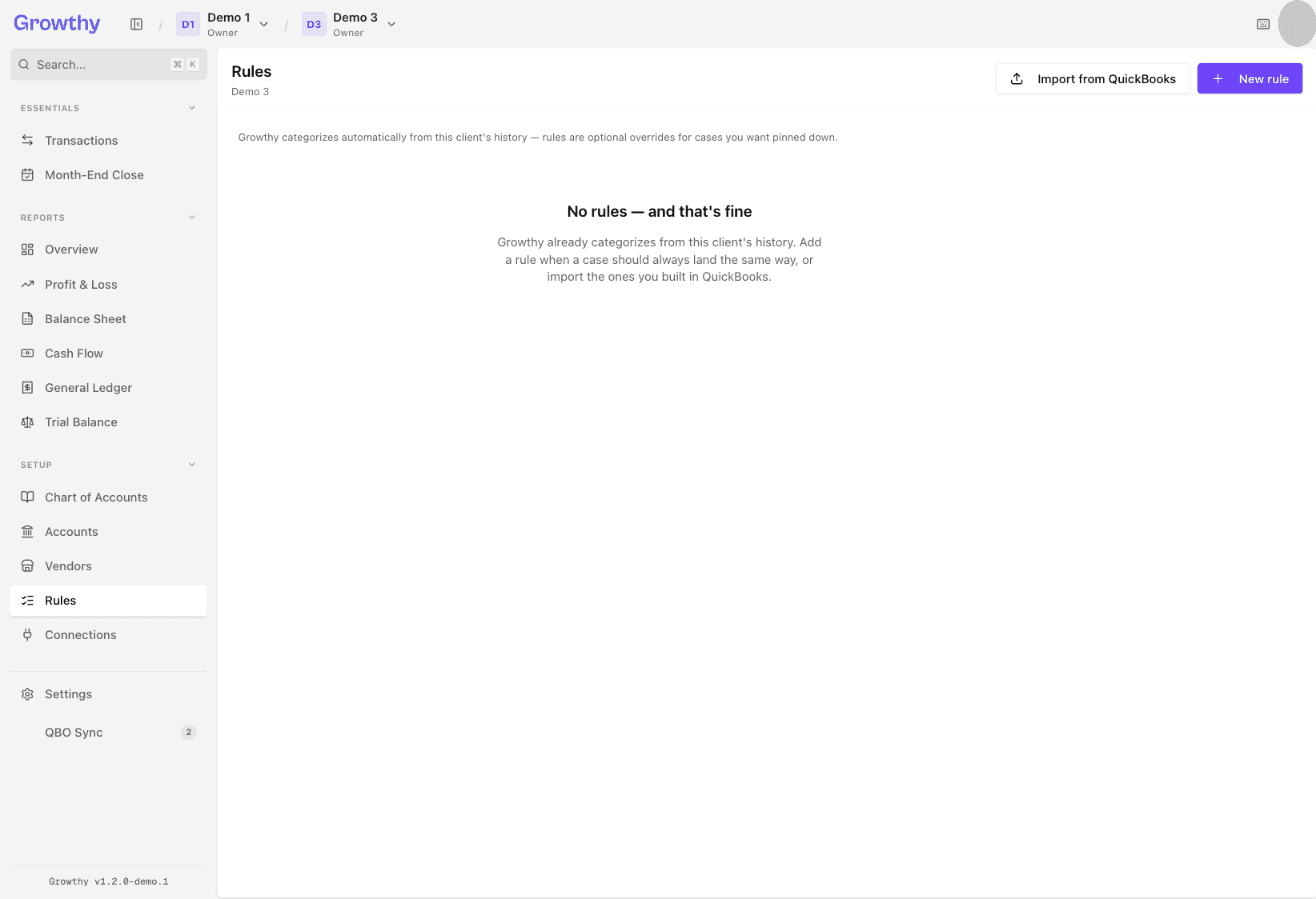
On the Rules page, select New rule to build a rule from a payee, description, or amount condition, or select Import from QuickBooks to bring in your existing QuickBooks bank rules.
Set up rules so Growthy categorizes matching transactions automatically.
Create a rule
- Open Rules, under Setup in the sidebar.
- Select New rule.
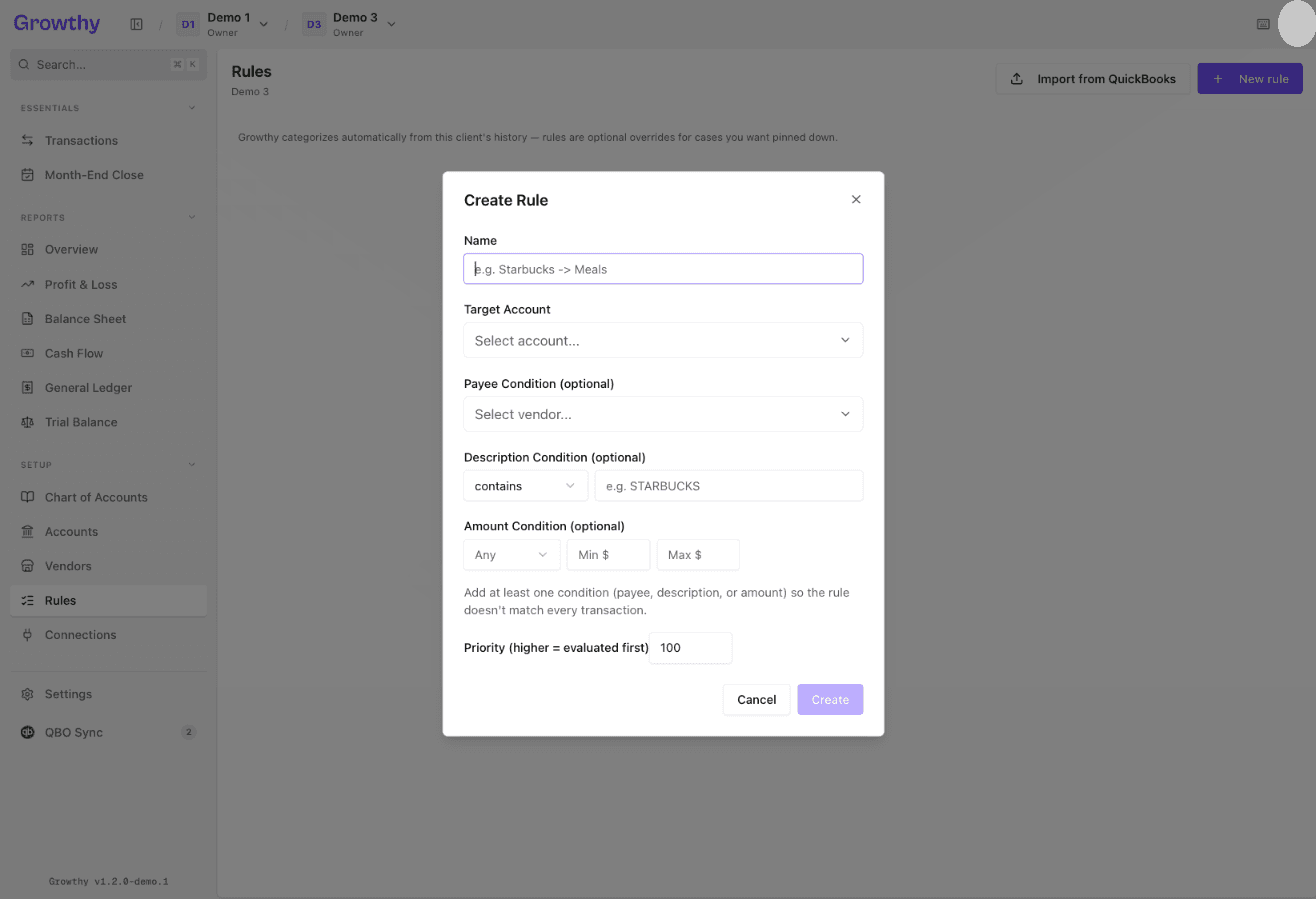
- In the Create Rule dialog, enter a Name and choose a Target Account.
- Set a Payee Condition (optional), Description Condition (optional), and/or Amount Condition (optional). For a description condition, choose Contains, Starts with, or Exact match. For an amount condition, choose Any, Debit, or Credit.
- Set the rule's Priority (higher = evaluated first).
- Select Create to save the rule, or Cancel to discard it.
Import your QuickBooks bank rules
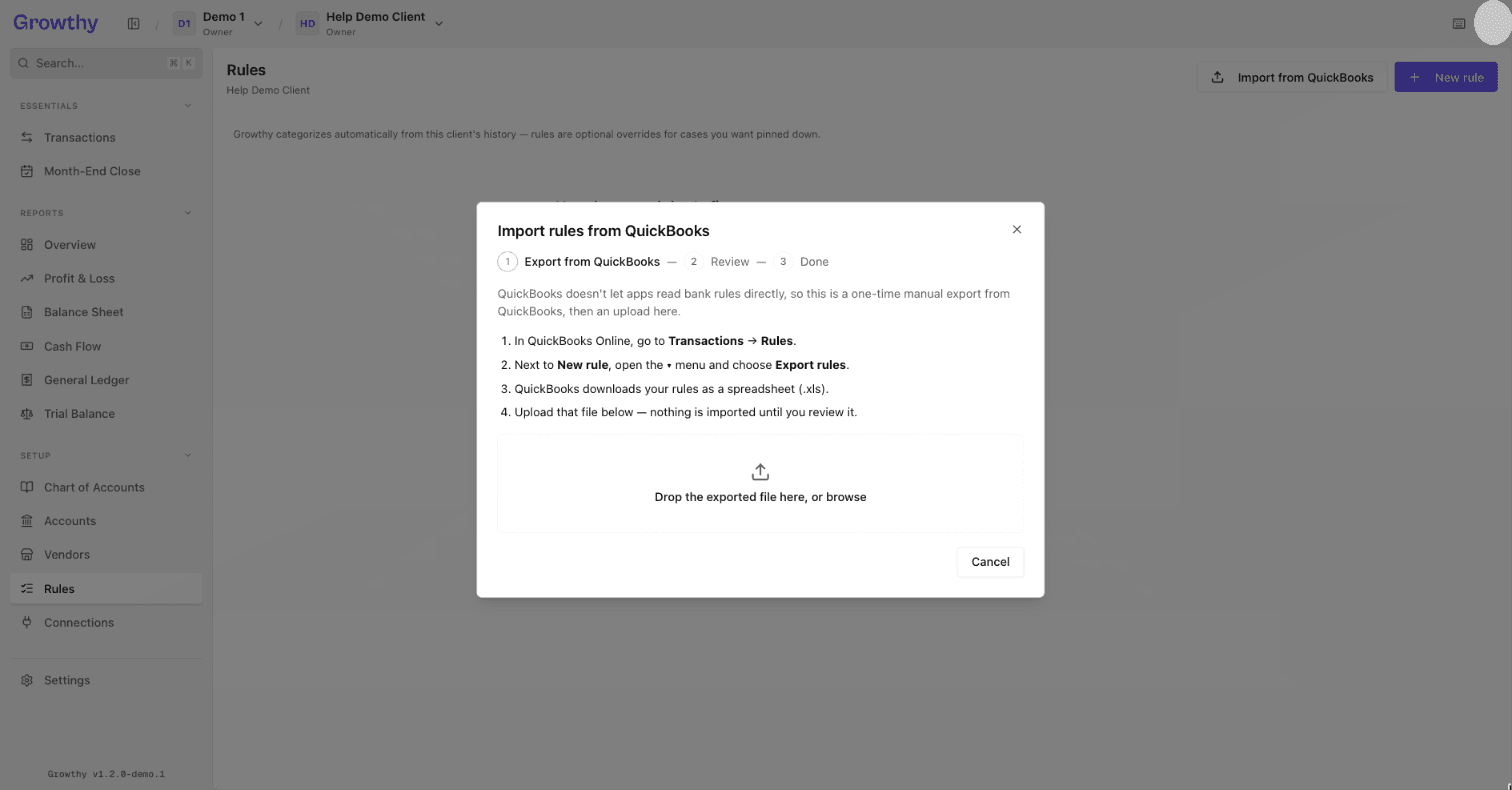
- On the Rules page, select Import from QuickBooks. This opens the Import rules from QuickBooks wizard.
- QuickBooks doesn't let apps read bank rules directly, so first export them: in QuickBooks Online, go to Transactions → Rules, then next to New rule, open the ▾ menu and choose Export rules. QuickBooks downloads your rules as a spreadsheet.
- Back in the wizard, upload that exported file.
- Review the rules found in the file.
- Select Import {N} rule(s) to bring them in — this both confirms and completes the import.
- Select View rules to see them. Imported rules are active and run on new transactions from now on; skipped rules can be added manually anytime.
Was this helpful?